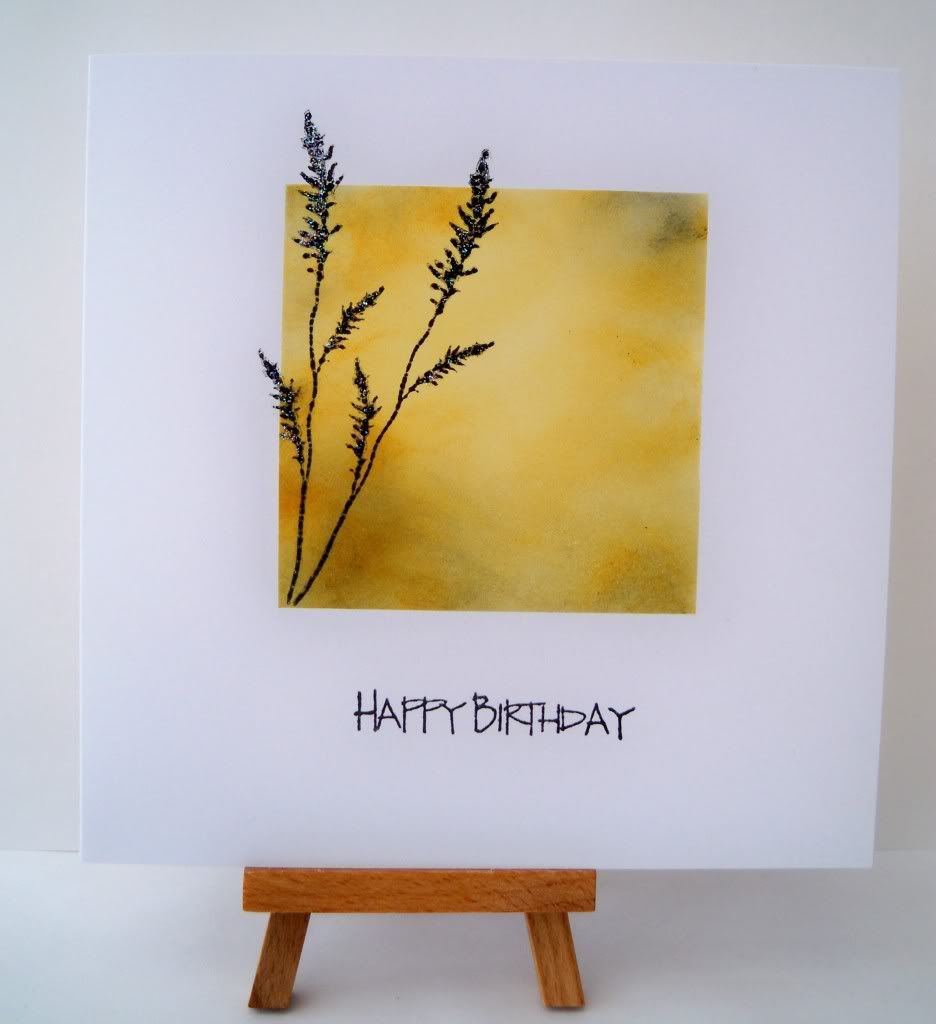
I've made another quick and simple card just using my inks, scrap paper and some stickles. I'm really pleased with how this turned out and can see myself making lots of them when I need a fast make.
Tools
Tim Holtz Blender
Materials
Card base - Craftwork Cards
Scrap Paper
Tim Holtz Distress Inks
Memento Ink
Image - Viva Paper Stamps
Stickles
I'd like to enter this into the following challenges:
The Corrosive Challenge - Masking
Stamptacular Sunday - Seasons Change
Craftalicious Challenges - Harvest/Autumn
Craft Your Passion - Clean and Simple
Pollycraft Monday - No designer papers
Cards for men - Autumn
A blog about Mixed Media, Paper Crafts, Altered Art and bit of card making thrown in for good measure. You will also find the odd tutorial and giveaway.
Monday 27 September 2010
Friday 24 September 2010
Adventures with Paper Piecing and Decoupage
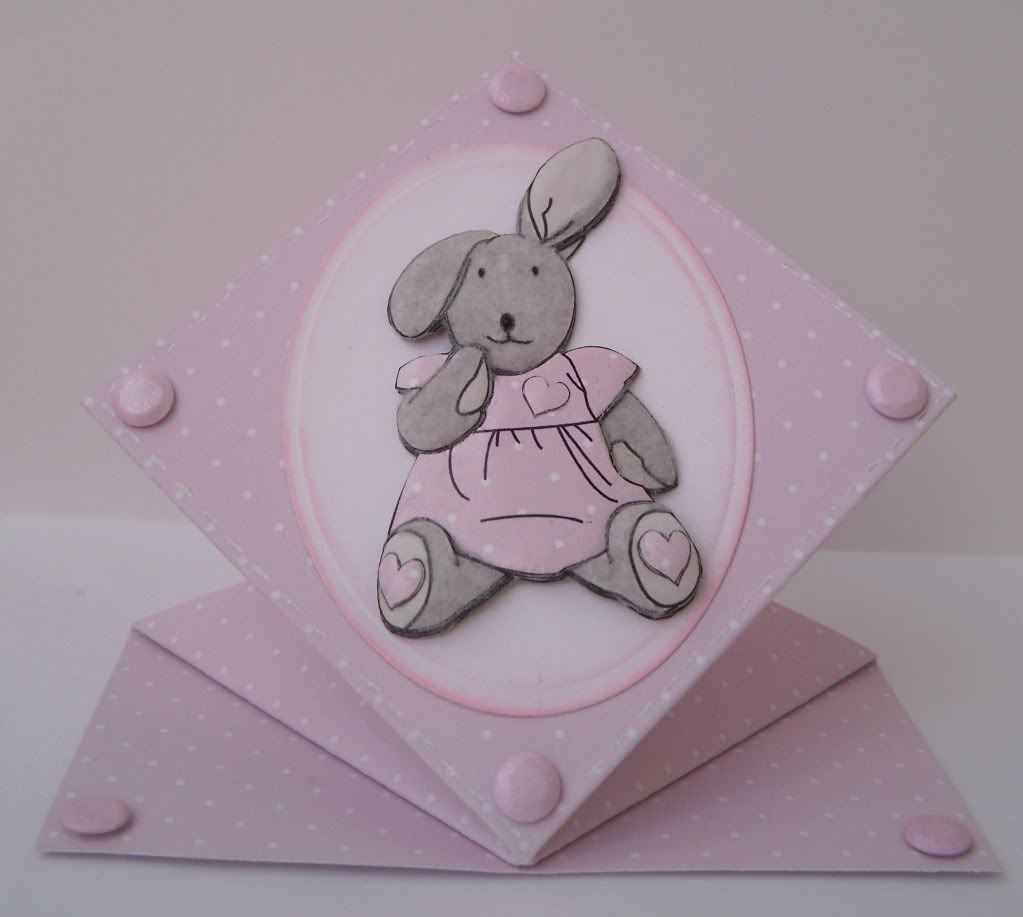
I've seen lots of cards with paper pieced images lately and have loved the results, so I decided that I'd give it a go. I chose this adorable little rabbit from Dragons Lair Designs and for reasons best known to myself decided that I'd decoupage the image as well. For those of you who have been following me for a little while, you'll remember I had a bit of a disaster with some shop bought decoupage and swore I'd never go there again! Well I'm really pleased that I gave it a second chance as I'm fairly pleased with the result and will definitely be using this technique again.
I used digi papers for this card and printed them directly onto my card base, which saved a whole lot of faffing (is that a word??) around with trying to glue papers onto a diamond fold base. The cute little bunny as I said has been paper pieced and decoupaged, but I didn't stop there! Oh no!! I found some grey flock that I've had sitting unused in my stash and bunged that on for good measure - (in order for my photo to show this up, I had to take the picture in really strong sunlight). I also added some faux stitching with white gel pen (you need to click on the 1st image and zoom in to see it).
Tools
Martha Stewart Scoreboard
Purple Cows Guillotine
Tim Holtz Blender
Sizzix Bigshot
Nestabilities Large Ovals
Tim Holtz Blender
Printer
Materials
Image - Dragons Lair Designs
DP - Jak Heath
Flock - Papermainia
White Gel Pen
Distress Ink
Card Candy - Craftwork Cards
I'd like to enter this card into the following challenges:
Crafty Emmas - Baby Bonanza
Sweet Stampin - Stitching
The Secret Crafter - Anything goes
The Corrosive Challenge - Clean up the dust (flocking)
Cowgirl's Sunday - Hip Not to be Square
Stamp with Fun - Stuffed Animals
Top Tip Tuesday - Top Tip - print directly onto card base
Papertake Weekly - Animal Magic
Pollycraft Monday - Cute & Cuddly
Anything Goes - Cute
Digital Tuesday - It's all about the girls
Freshly Brewed - Paper Piecing
Sarah Hurley - Polka Dots & Circles
Penny's Paper-Crafty - Anything Baby
Charisma Cards - Anything goes
A Spoonful of Sugar - Anything goes
Crafty Catz - Stitching
Papercutz - Critter
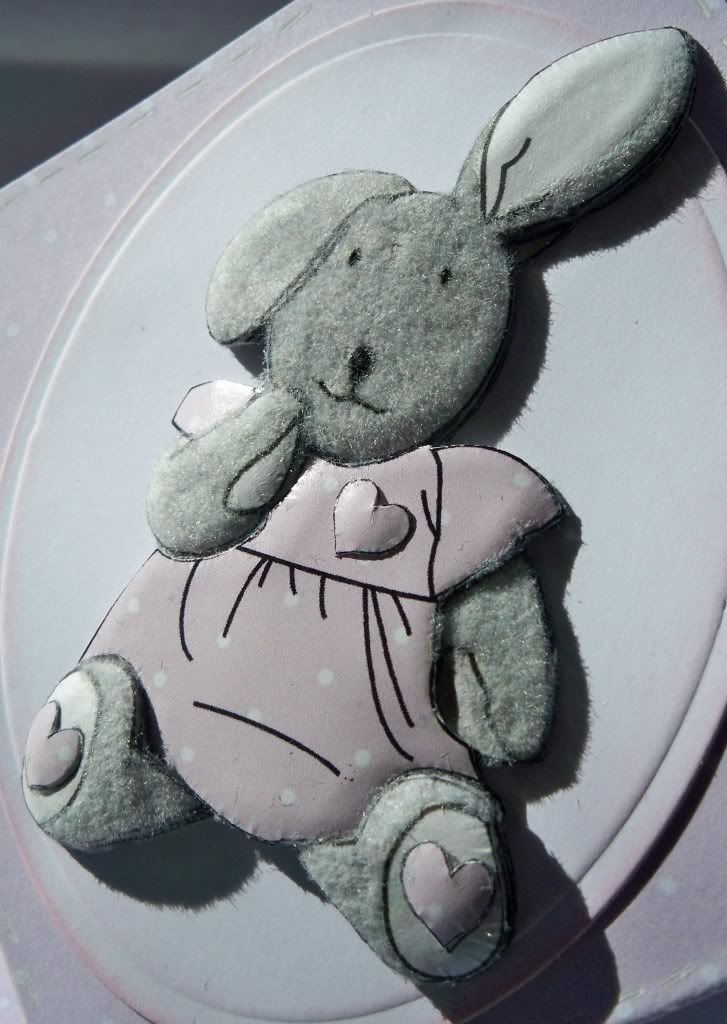 |
| Close up to show fuzziness |
Tools
Martha Stewart Scoreboard
Purple Cows Guillotine
Tim Holtz Blender
Sizzix Bigshot
Nestabilities Large Ovals
Tim Holtz Blender
Printer
Materials
Image - Dragons Lair Designs
DP - Jak Heath
Flock - Papermainia
White Gel Pen
Distress Ink
Card Candy - Craftwork Cards
I'd like to enter this card into the following challenges:
Crafty Emmas - Baby Bonanza
Sweet Stampin - Stitching
The Secret Crafter - Anything goes
The Corrosive Challenge - Clean up the dust (flocking)
Cowgirl's Sunday - Hip Not to be Square
Stamp with Fun - Stuffed Animals
Top Tip Tuesday - Top Tip - print directly onto card base
Papertake Weekly - Animal Magic
Pollycraft Monday - Cute & Cuddly
Anything Goes - Cute
Digital Tuesday - It's all about the girls
Freshly Brewed - Paper Piecing
Sarah Hurley - Polka Dots & Circles
Penny's Paper-Crafty - Anything Baby
Charisma Cards - Anything goes
A Spoonful of Sugar - Anything goes
Crafty Catz - Stitching
Papercutz - Critter
Thursday 23 September 2010
A Distressed Christmas!
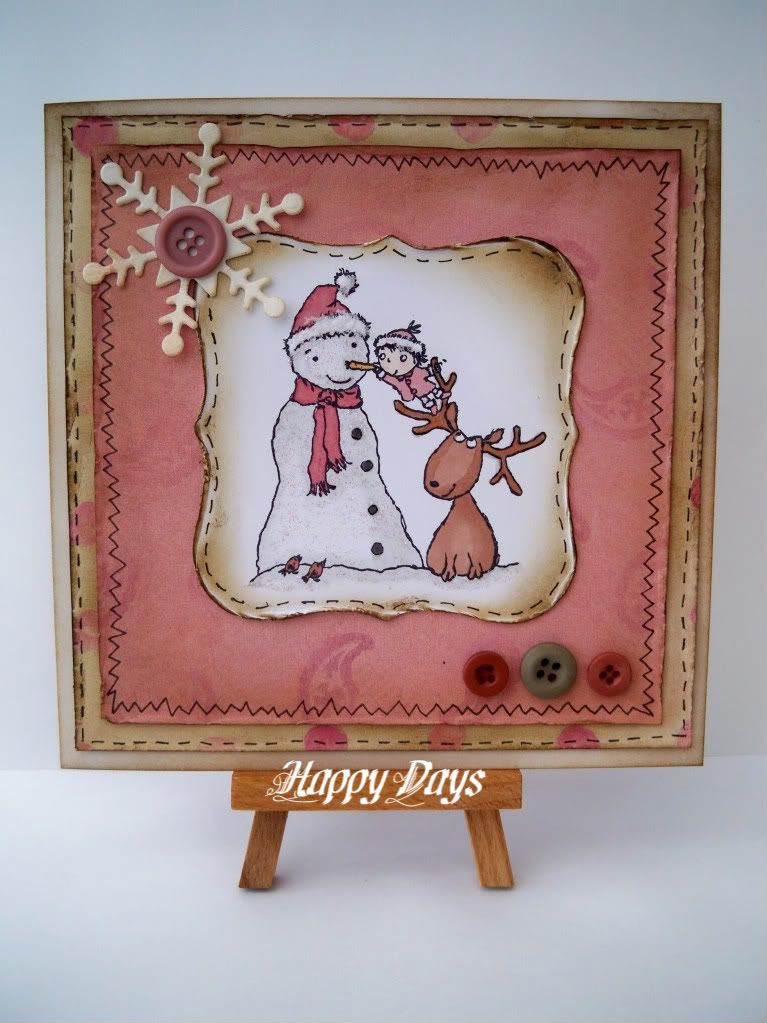
Finally I've made another Christmas card! This one took me a little out of my comfort zone as it uses non - traditional colours and papers and a really cutesy image. I've not decided who I'm going to send it to, but it's another one off of my list :)
I inked the card base with distress inks. The DP's have been distressed and then inked. The image has been coloured with Promarkers and then the snowman and ground have been given the Stickles treatment. The snowman's hat has been given a sprinkling of Soft Magic (not sure how clearly my picture shows it, but it's quite fluffy). I've added some faux stitching to finish the card off.
Tools
Purple Cows Guillotine
Spellbinders Nestabilities - Labels one
Big Shot
Marianne Creatables - Snowflake die
Tim Holtz Blender Tool
Materials
Card base - Craftwork Cards
DP's - K&Co Hopscotch
Tim Holtz Distress Inks - Tea Dye, Walnut Stain
Image - Ladybug Stamps
Buttons - stash
Stickles - Stardust
Soft Magic - white
Promarkers - cool grey 1, cinnamon, dusky pink
I'd like to enter this card into the following challenges:
Christmas Card Challenges - Distressing
For Fun Challenges - Vintage
ABC Challenge - D is for Distressing
Creative Belli - B Themed Embellishments
Charisma Cards - Anything goes
A Spoonful of Sugar - Anything goes
Friday 17 September 2010
Stamping With The Dragon Challenge #10
This fortnight the challenge over at Stamping With The Dragon is to use black, white and one other colour on your creation. We are sponsored by Toucan Scraps who is offering the winner six digi papers of their choice. I hope you can join us.
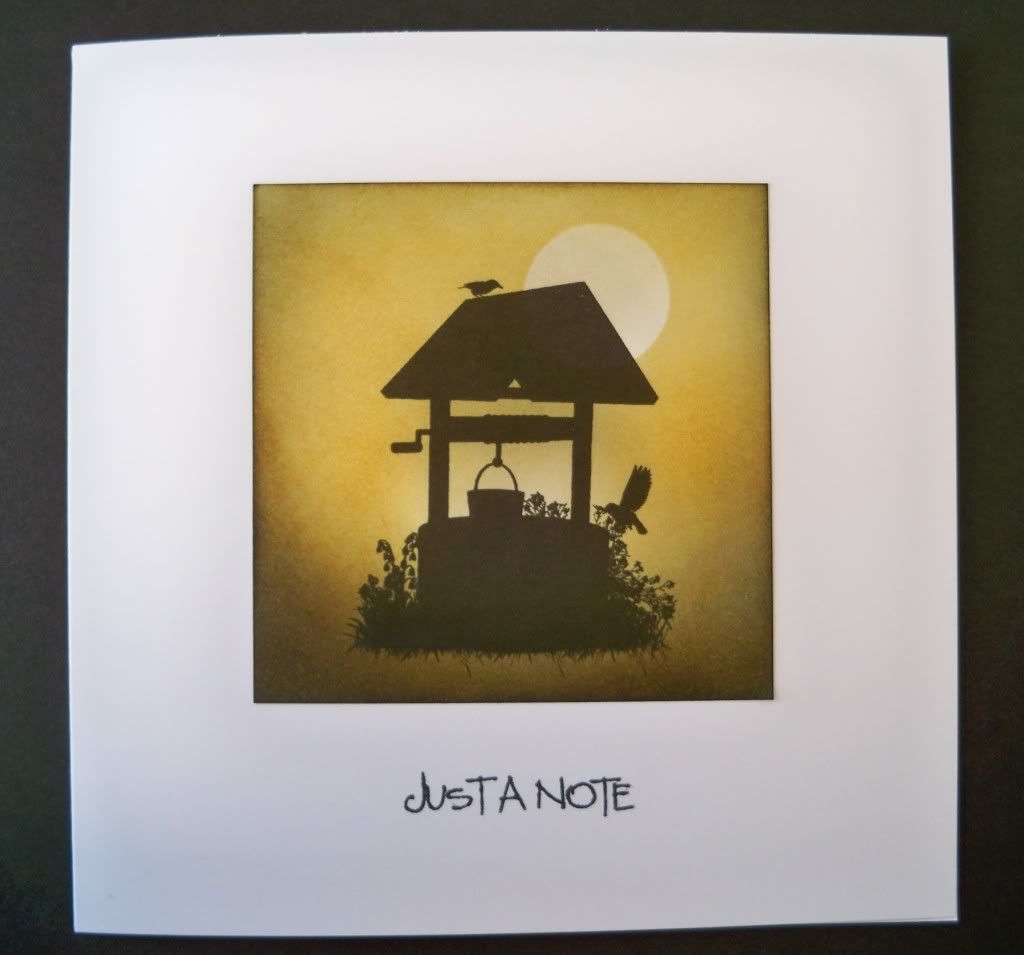
I decided to keep my card quick and simple this time, so there are no embellishments, no glitz and sparkle (yikes) and no designer papers, just a large area of white (gulp)! Oh and I also decided to stamp directly onto the card!!! I really wanted to show of the beautiful image on this card and decided this was the way to go - I hope it's worked out OK!!
So here is my naked card!!
Tools
Purple Cows Guillotine
Tim Holtz Blender
Materials
Image - Toucan Scraps
Card base - Craftwork Cards
Tim Holtz Distress Inks - Spiced Marmalade, Black Soot
Sentiment - Ladybug Stamps
I'd like to enter this card into the following challenges:
Sweet Stampin Challenge - Just a note
Crafty Cardmakers - Clean & Simple
Cute Card Thursday - A tweet and a flutter
Rainbow Lady's Challenge - Feathers
Pixie Dust Studio - Fur or Feathers
Mark's Finest Papers - Fall colours
Monday 13 September 2010
It's those Skull Boyz Again!
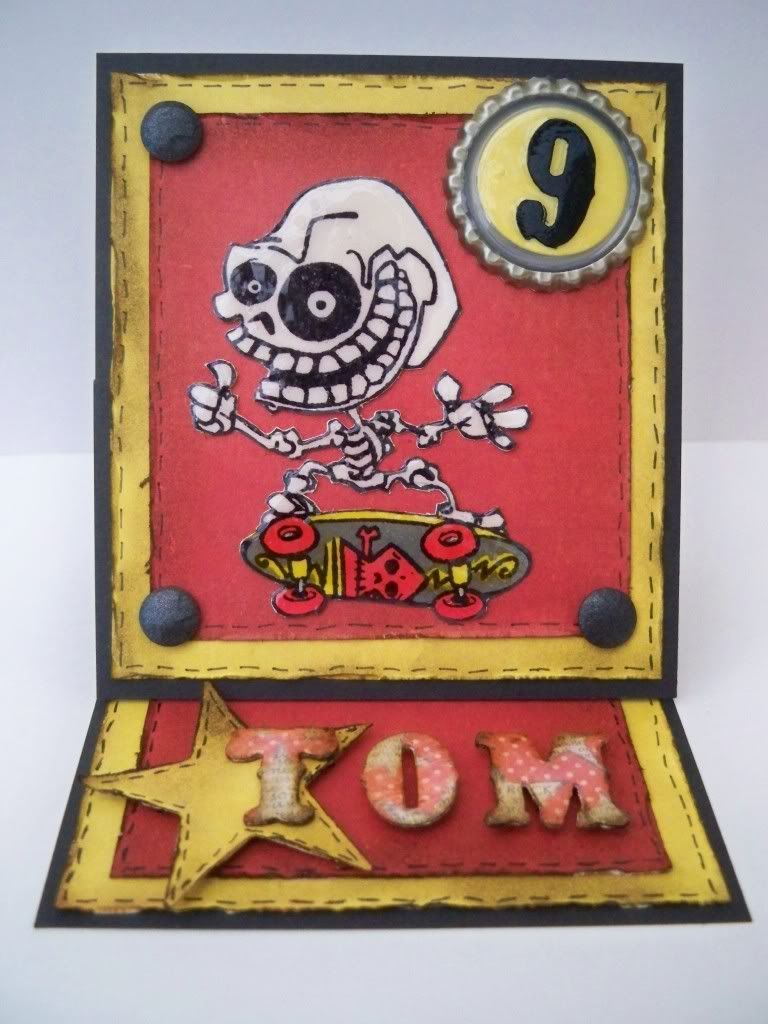
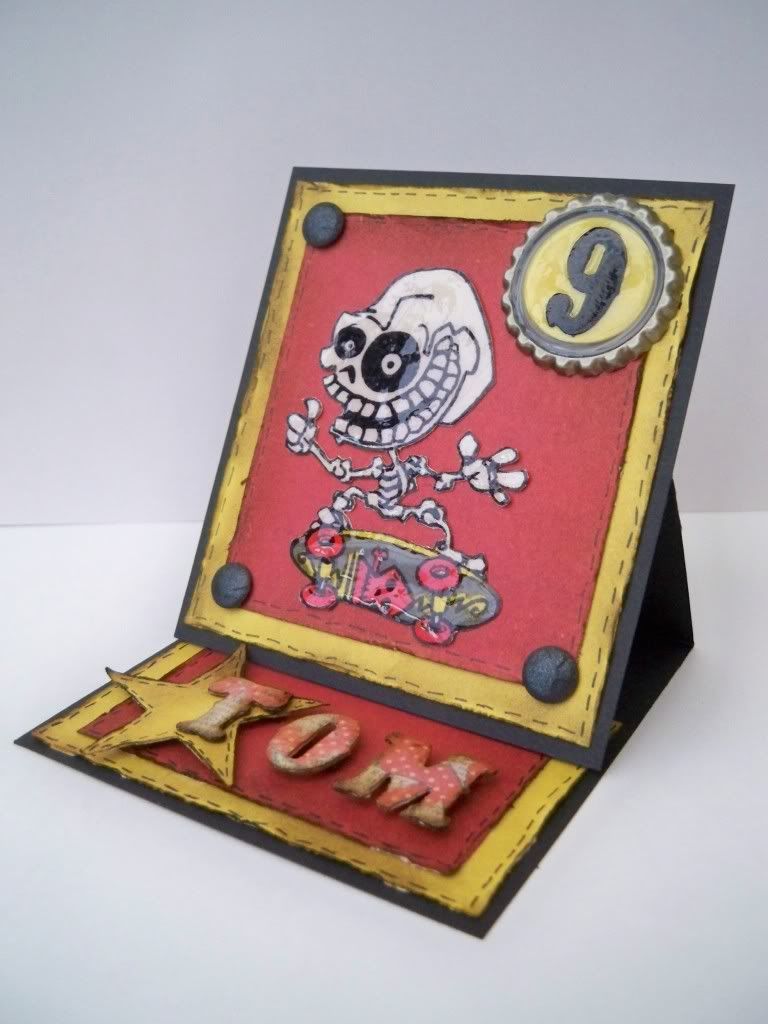
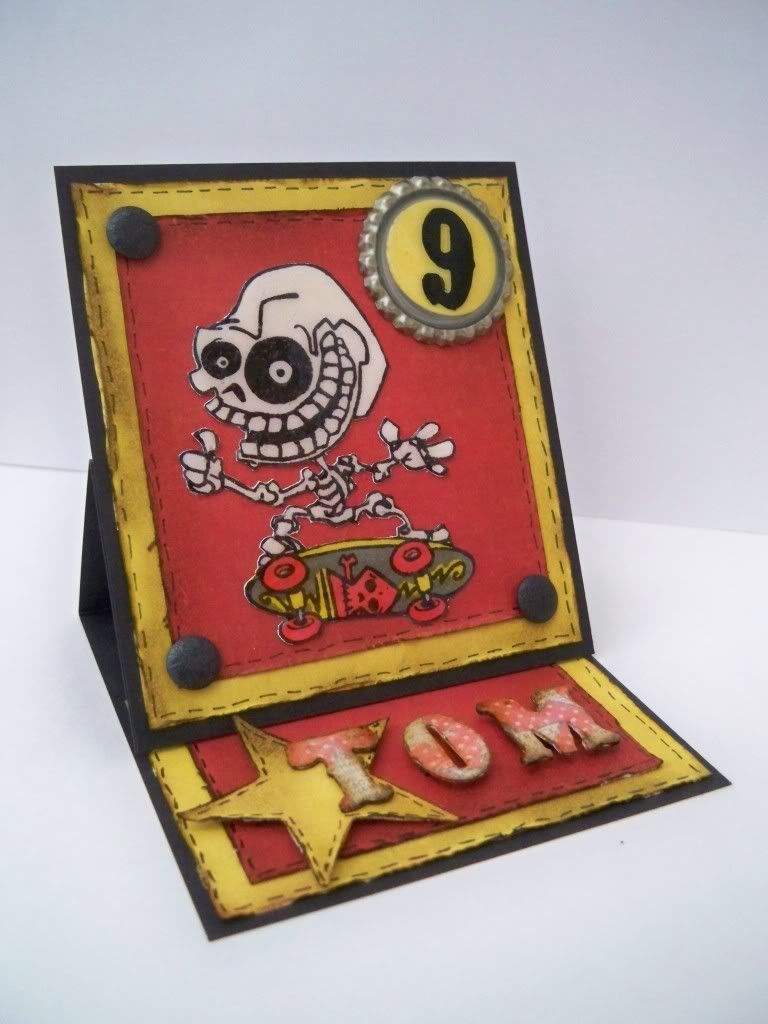
It's my son's best friends birthday today and Zak was adamant that I had to make Tom a card like his as when Tom had seen it, he'd said "it was sick" (such a nice turn of phrase don't you think?). I explained to Zak that I didn't have time to make one exactly like his but that I could do something similar. To say this didn't go down very well is an understatement, so we eventually came to a compromise as apparently the really "sick" things about the card were the skulls and the fact that Zak's name was on the card. This is what I came up with up and it has met with his lordships' approval, just hope that Tom likes it now!
I'd like to enter this card into the following challenges:
Sir Stampalot Challenge - Distressing
The Stampman - Distressing
Stamps R Us - Child's Birthday
Craft Your Passion - Easel Card
I'd like to enter this card into the following challenges:
Sir Stampalot Challenge - Distressing
The Stampman - Distressing
Stamps R Us - Child's Birthday
Craft Your Passion - Easel Card
Saturday 11 September 2010
Golden Wedding Anniversary Card
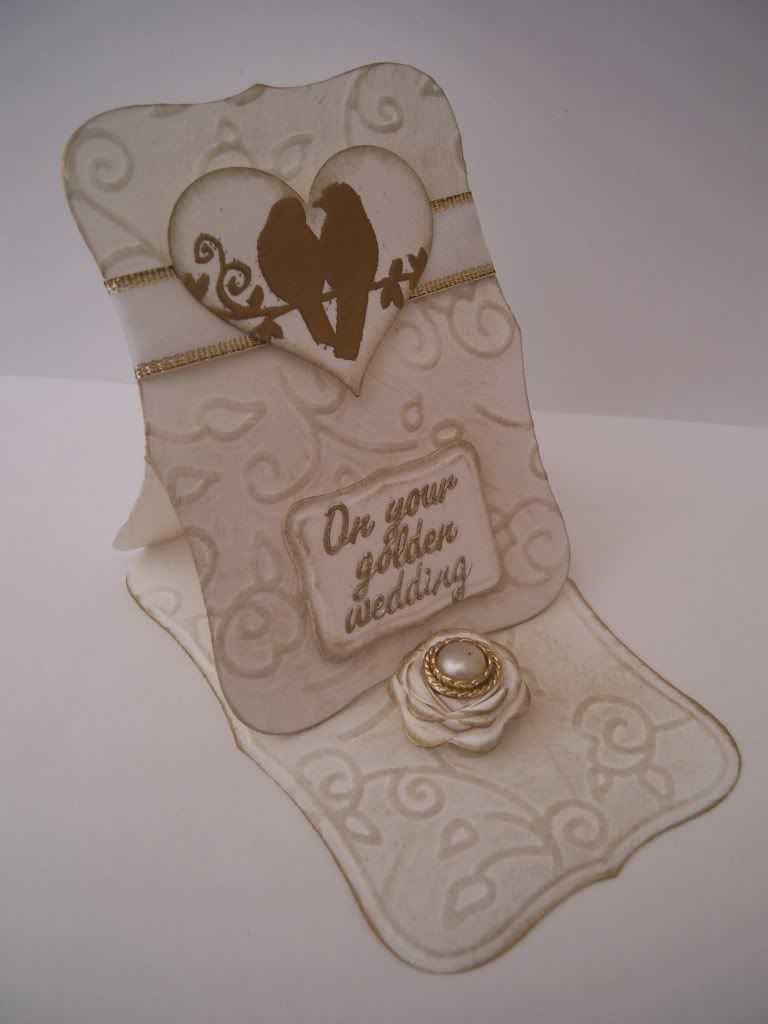
This card was a complete rush job. My brother's wife's parents celebrated 50 years of marriage yesterday and I didn't feel that I could let it pass without some form of acknowledgement. I only found out yesterday morning when my SIL turned up out the blue on my doorstep (she lives quite a distance away) en-route to her parents house. I hope it doesn't look too rushed (I would've loved to have done something a little more detailed, but time was against me).
I've used my nesties to create the easel card, I've then embossed the pearlescent card and swiped it over with a gold ink pad. I've stamped the duo of birds and heat embossed them and then punched out the heart. The flower was made using my trusty 3D flower die, I did it a little differently this time and left room for a centre. Unfortunately, I've had to use peel offs for the sentiment (shhhh don't tell anyone) as my handwriting today was awful, I didn't have a suitable stamp and I couldn't get a digi stamp to print in gold and the card I was using didn't want to know about heat embossing the digi either!
Tools
Sizzix Bigshot
Nestabilities - Labels 8
Sizzix Texturz Plate
Sizzix 3D Flower Die
Fiskars Large Heart Punch
Heat gun
Materials
Pearlescent card
Gold ink pad
Image - Personal Impressions
Ribbon - stash
Pearl button - stash
I'd like to enter this card into the following challenges:
Pear Tree Designs - Animals
Stamp with Fun - Weddings (I hope this still counts)
Everybody Art - Handmade flowers
A Spoonful of Sugar - Animals
Alphabet Challenge - Trees (the birds are sitting on a branch)
Totally Gorjuss - Flower
Fairy Fun Fridays - Embossing
Stampin' for the Weekend - Shabby or Vintage
A Pocket Full of Posies - Flowers
Our Creative Corner - Fun with folds
Bunny Zoes - Vintage
Cowgirls' Sunday Stamp'en Challenge - Anything goes
Fab n Funky - What Eva
Gingersnap Creations - Punches
Incy Wincy - Celebrate
Really Reasonable Ribbons - Flowers
Creative Cottage - Celebrations
Friday 10 September 2010
Altered Notebook
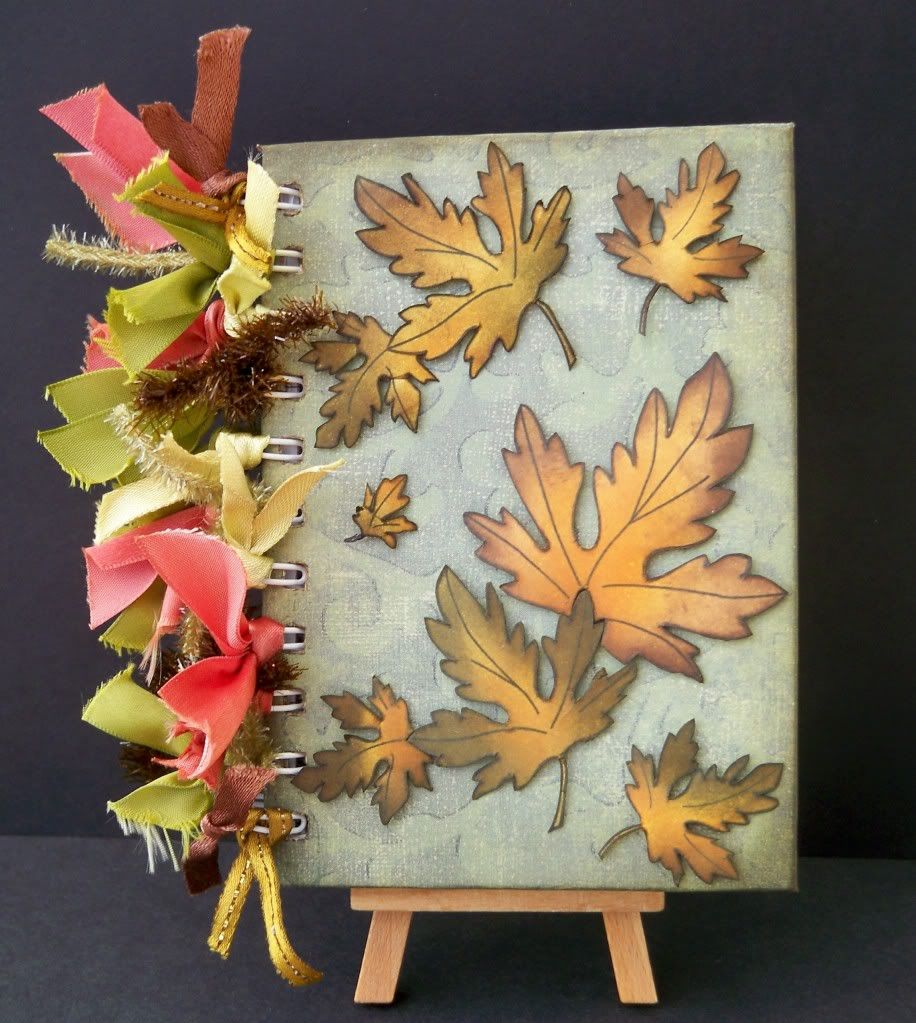
Back in the summer I saw a gorgeous altered notebook on Dragonlew's blog which made me want to make one for myself. Well finally I've got around to making one! I'm not sure about all the ribbon, but I have so much of the stuff I figured I better start using it. Unfortunately, this one won't be for me as my friend came round for coffee, spotted it and has nabbed it for her MIL's stocking filler. I'm not sure what's happened with my photo, it's made the colours look like they are really faded (they're actually a lot more bright and vibrant than this).
The leaves are a digi stamp from Dragons Lair Designs. I've coloured them with distress inks, cut them out and mounted them on foam pads to give a little dimension. The notepad was a cheapy 59p one from ASDA and I've just covered it with papers from K&Co. I've coloured some of the ribbons with Promarkers to try and keep the autumnal colour scheme.
Tools
Tim Holtz Blender
Basic Grey Sanding Set
Materials
DP - K&Co
Notebook - Asda
Leaves - Digi Stamp from Dragons Lair Designs
Distress Inks
Ribbons from stash
I'd like to enter this into the following challenges:
Bee Crafty - Anything Goes
Cowgirl's Sunday Challenge - Anything goes
Crazy 4 Challenges - Anything Book Related
Tuesday Taggers - Books
PaperPlay - Autumn
Charisma Cardz - Try something new (altering a notebook for the 1st time)
Delightful Challenges - Ribbons in the colours shown
Southern Girls Challenge - Anything goes
Fab n Funky - What eva!
Fresh Brewed - Brown
Your Next Stamp - Anything goes
Anything Goes - Autumn
Tuesday Throwdown - Celebrate Fall
Bunny Zoes Craft's - Vintage
Sunday 5 September 2010
Creating Reflections Using Digi Stamps
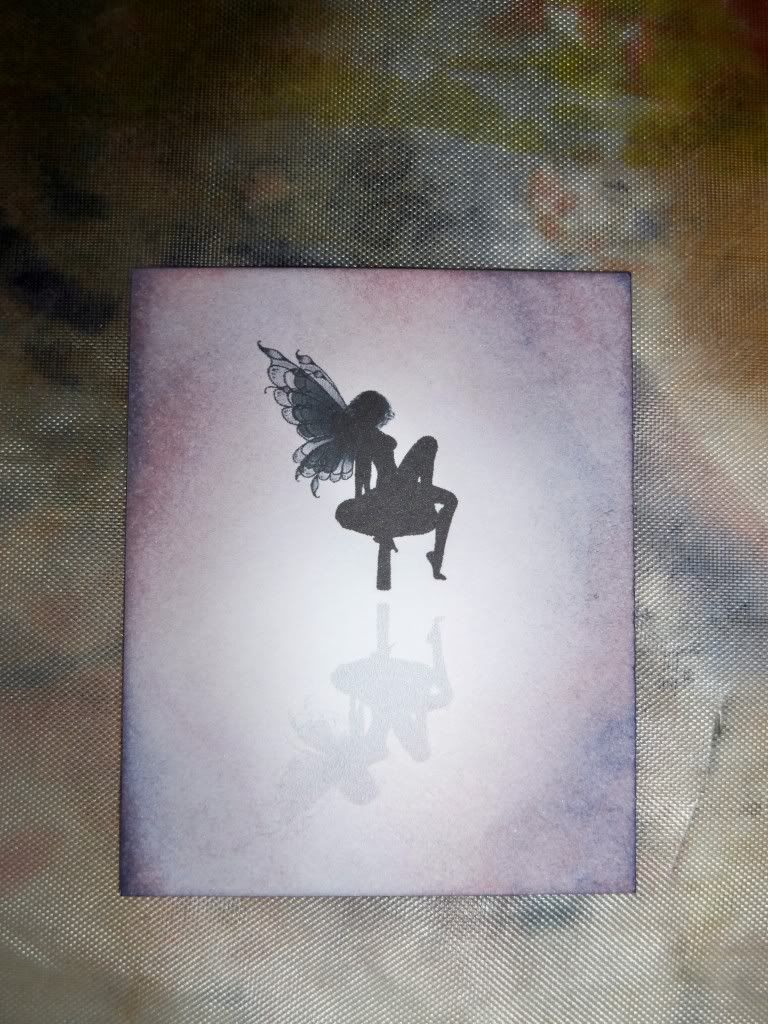
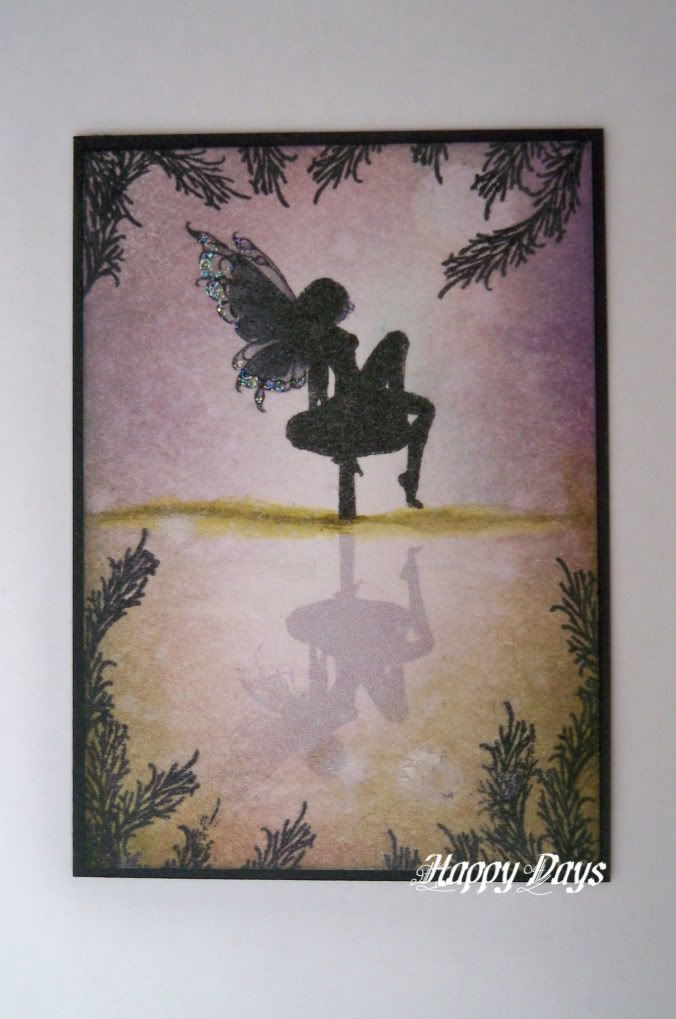
I've had several requests asking me to detail how the reflection in my Moonlight Reflections ATC was created. Using digi stamps it's really simple - no messing around with brayers or erasers!! I've tried to cover all computer skill levels in this tutorial, so apologies if it seems overly simplified for many of you, but I know that there are a number of crafters out there who struggle to resize images and use word processing documents. Also, please bear in mind that I am self taught and that this is my way of doing things - I'm sure there are probably better and easier methods, but at this moment in time I'm not aware of them. I've also assumed that the reader of this tutorial has limited experience of creating backgrounds - so if I'm teaching you to suck eggs, apologies again!
Anyway, onto the tutorial.....
It's easier if you gather your materials together before you start, so this what you will need:
Image - I used this one, but you can use anything you like
Distress Inks - at least two colours
Blender Tool or Cut'n'Dry Foam or if your really pushed a cosmetic sponge
Smooth White Card - the smoother the better, especially if you're not used to working with distress inks
Craft Sheet - if you haven't got one and don't want to invest in one, buy a non-stick cooking liner from Poundland
Pack of tissues
Water Barrel Brush
Glimmer Mist (optional)
Paper (cheap printer paper is fine)
Low tack masking tape
1. Cut the card to the desired size and put to one side.
2. Open a word processing document (I'm using Word for this tutorial but you can use Open Office as it does pretty much the same thing).
3. Import your image.
4. Place your mouse above the image and then right click the image and select format picture from the drop down list. A grey box will appear, along the top there will be a series of tabs, select the layout one and then behind text, click OK.
5. Right click the image again and select format picture. Then select the tab marked size. Ensure the lock aspect ratio box is ticked and then size the image to fit your project (remembering that you are going to eventually have two of the images on your work). Click OK.
6. Then right click the image and select copy and then right click again and select paste.
7. Holding the left mouse button down, drag the image below the original image as shown below.
8. Ensure the second image is still selected (it will have a green dot at the top and white dots in the corner), go to draw and then select rotate or flip and then select vertical.
9. Hold the left mouse button down and then drag the image into position as shown below.
10. Ensure the bottom image is selected, then right click, edit image and select the tab marked Picture, halfway down the box it says colour, click the drop down box and select either washout or greyscale depending upon your projects requirements. Your images should now look something like this.
11. Mark the top left hand corner of the printer paper with a cross, then print the image onto paper. If you have a top feed printer the image should have printed in the bottom right hand corner. If your printer is not a top feed, you will need to figure out where the image will print, but by marking the cross it should simply things.
12. Put to one side.
Next create your background. If you've not used distress inks before it may take you a few plays to achieve the result you want, but once you've sussed it you'll be able to do it in minutes. Just remember to use the ink sparingly, you can always add more, but you can't remove it. You're going to have to forgive the state of my mat, it's my old one that I use for Promarkers and Stazon projects.
13. Place your smooth card onto the craft sheet, take the lightest colour ink you are using and dab the blender tool onto the pad. Starting on the craft sheet work in circular motions towards the centre of the card, don't worry if it looks a bit patchy it will just add to the effect. I normally leave a small area white (see the picture below) but it's upto you how you want to do it. Once you're happy with the colour (remembering that you can always add more ink) change to the next colour in your palette and repeat the above, but don't work quite as far into the centre. Repeat the above as many times as you wish until you've achieved the desired effect, you now have your background.
14. Take the piece of paper with the image on and tape it to a window using low tack masking tape.
15. Now take your background and position it over the image. Move it around until you have positioned it perfectly. Secure the background onto the paper using low tack masking tape (see the picture below).
16. Remove from the window and place the paper back into the printer ensuring that the cross is in the top left hand corner, then hit the print button. You should now have the image printed onto your background exactly where you wanted it.
The final step is to ground the image and add details like the moon and ripples in the water. Big tip don't try to take photographs of yourself doing this otherwise you might accidentally touch the image and make the ink bleed as in my photo :)
18. Finally, have your brush in one hand and a tissue in the other. Using water paint a circle where you want the moon to be, blot instantly with the tissue. Repeat as desired. Then using the same technique draw squiggly lines with water and blot.
At this stage I often give the image a little spritz of glimmer mist and run a little stickles down the edges of the wings.
That's it - I hope my instructions are clear (if not please feel free to make suggestions and I'll try to adapt things to suit) and that you've managed to achieve the effect you wanted.
Anyway, onto the tutorial.....
It's easier if you gather your materials together before you start, so this what you will need:
Image - I used this one, but you can use anything you like
Distress Inks - at least two colours
Blender Tool or Cut'n'Dry Foam or if your really pushed a cosmetic sponge
Smooth White Card - the smoother the better, especially if you're not used to working with distress inks
Craft Sheet - if you haven't got one and don't want to invest in one, buy a non-stick cooking liner from Poundland
Pack of tissues
Water Barrel Brush
Glimmer Mist (optional)
Paper (cheap printer paper is fine)
Low tack masking tape
1. Cut the card to the desired size and put to one side.
2. Open a word processing document (I'm using Word for this tutorial but you can use Open Office as it does pretty much the same thing).
3. Import your image.
4. Place your mouse above the image and then right click the image and select format picture from the drop down list. A grey box will appear, along the top there will be a series of tabs, select the layout one and then behind text, click OK.
5. Right click the image again and select format picture. Then select the tab marked size. Ensure the lock aspect ratio box is ticked and then size the image to fit your project (remembering that you are going to eventually have two of the images on your work). Click OK.
6. Then right click the image and select copy and then right click again and select paste.
7. Holding the left mouse button down, drag the image below the original image as shown below.
8. Ensure the second image is still selected (it will have a green dot at the top and white dots in the corner), go to draw and then select rotate or flip and then select vertical.
9. Hold the left mouse button down and then drag the image into position as shown below.
10. Ensure the bottom image is selected, then right click, edit image and select the tab marked Picture, halfway down the box it says colour, click the drop down box and select either washout or greyscale depending upon your projects requirements. Your images should now look something like this.
11. Mark the top left hand corner of the printer paper with a cross, then print the image onto paper. If you have a top feed printer the image should have printed in the bottom right hand corner. If your printer is not a top feed, you will need to figure out where the image will print, but by marking the cross it should simply things.
12. Put to one side.
Next create your background. If you've not used distress inks before it may take you a few plays to achieve the result you want, but once you've sussed it you'll be able to do it in minutes. Just remember to use the ink sparingly, you can always add more, but you can't remove it. You're going to have to forgive the state of my mat, it's my old one that I use for Promarkers and Stazon projects.
13. Place your smooth card onto the craft sheet, take the lightest colour ink you are using and dab the blender tool onto the pad. Starting on the craft sheet work in circular motions towards the centre of the card, don't worry if it looks a bit patchy it will just add to the effect. I normally leave a small area white (see the picture below) but it's upto you how you want to do it. Once you're happy with the colour (remembering that you can always add more ink) change to the next colour in your palette and repeat the above, but don't work quite as far into the centre. Repeat the above as many times as you wish until you've achieved the desired effect, you now have your background.
 |
| One colour |
 |
| Two colours |
15. Now take your background and position it over the image. Move it around until you have positioned it perfectly. Secure the background onto the paper using low tack masking tape (see the picture below).
16. Remove from the window and place the paper back into the printer ensuring that the cross is in the top left hand corner, then hit the print button. You should now have the image printed onto your background exactly where you wanted it.
The final step is to ground the image and add details like the moon and ripples in the water. Big tip don't try to take photographs of yourself doing this otherwise you might accidentally touch the image and make the ink bleed as in my photo :)
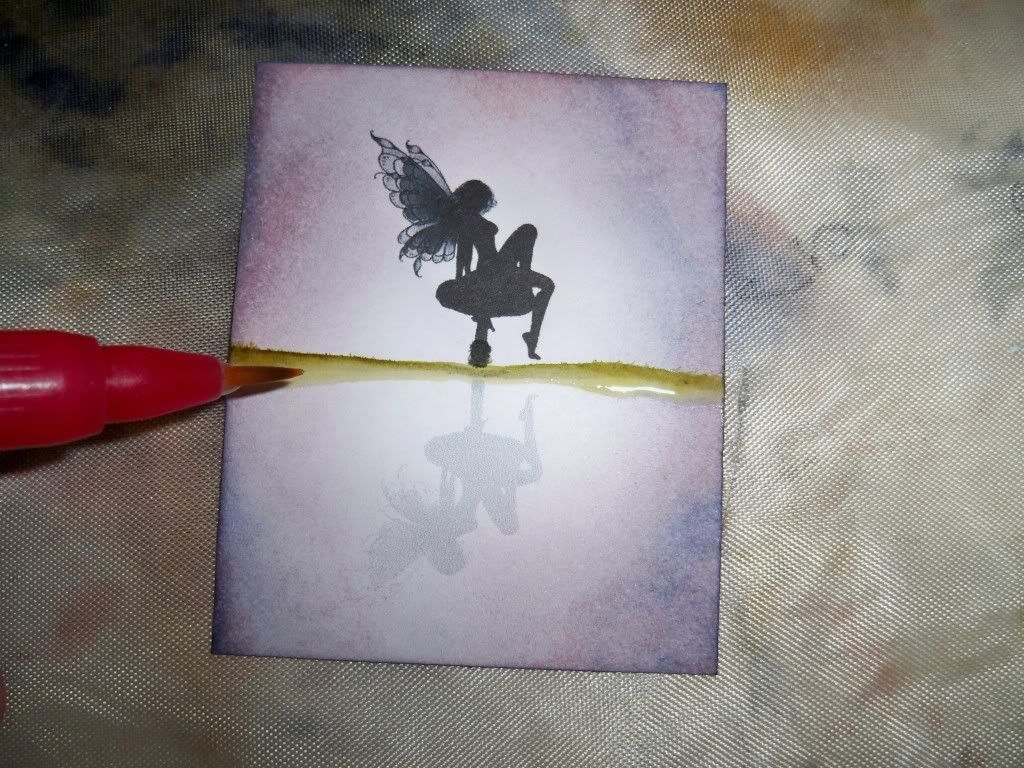 |
| Grounding the image |
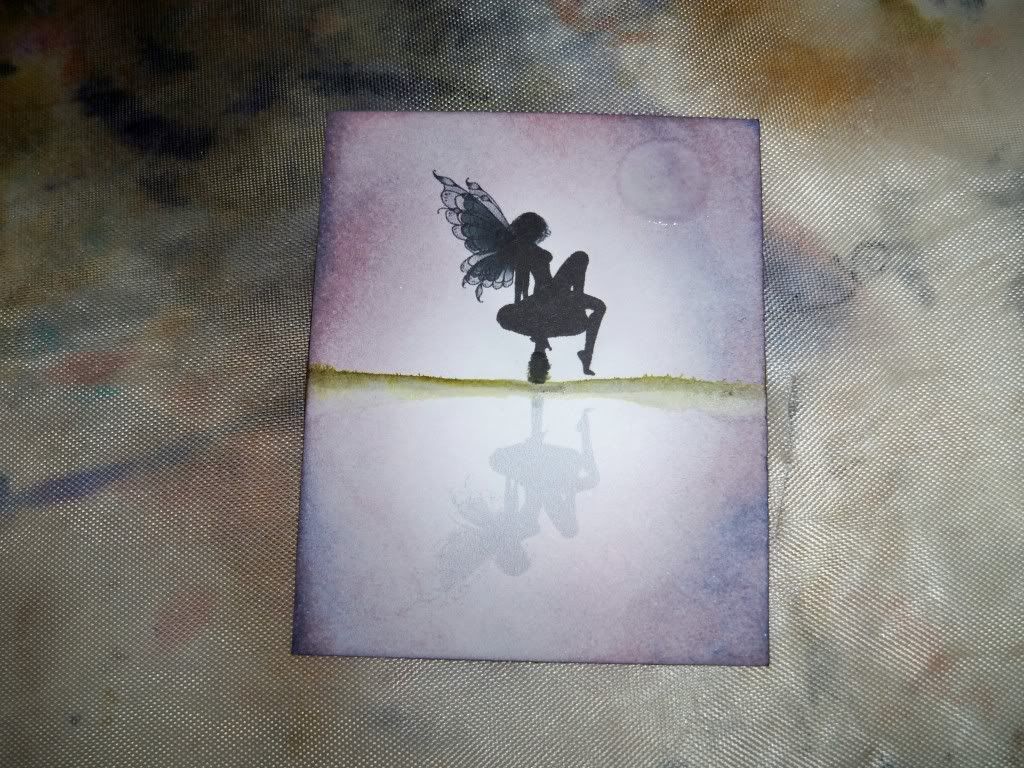 |
| creating the moon |
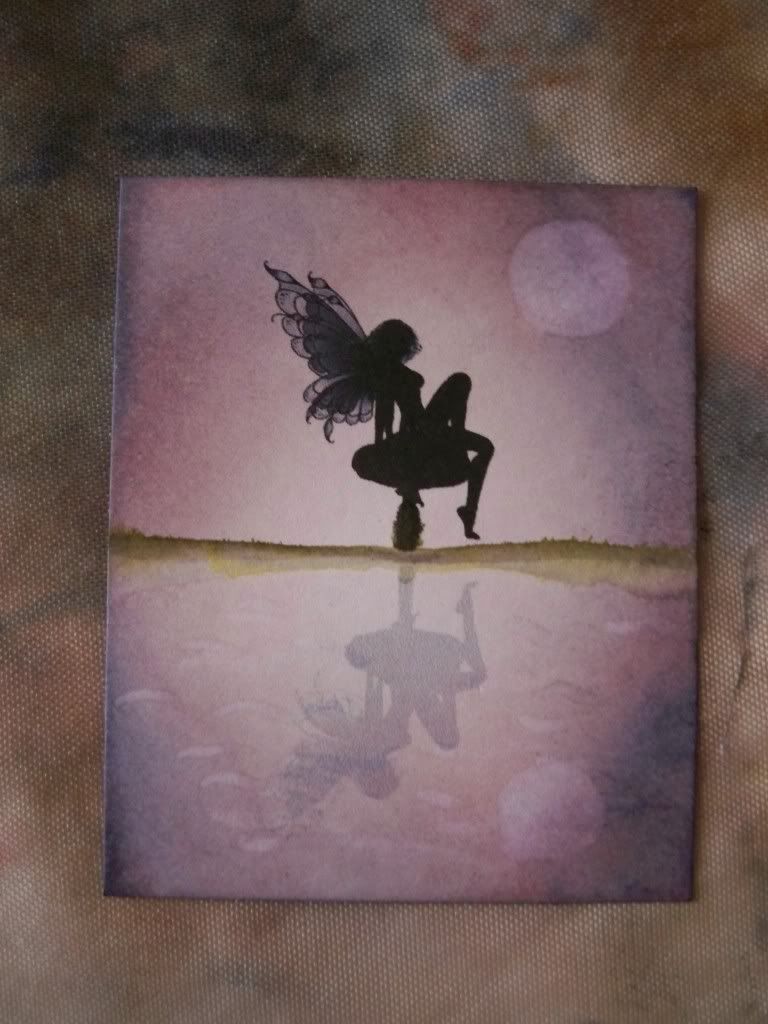 |
| the finished project |
At this stage I often give the image a little spritz of glimmer mist and run a little stickles down the edges of the wings.
That's it - I hope my instructions are clear (if not please feel free to make suggestions and I'll try to adapt things to suit) and that you've managed to achieve the effect you wanted.
Saturday 4 September 2010
Moonlight Reflections ATC & Flowing In Blue Sweet Pea Card
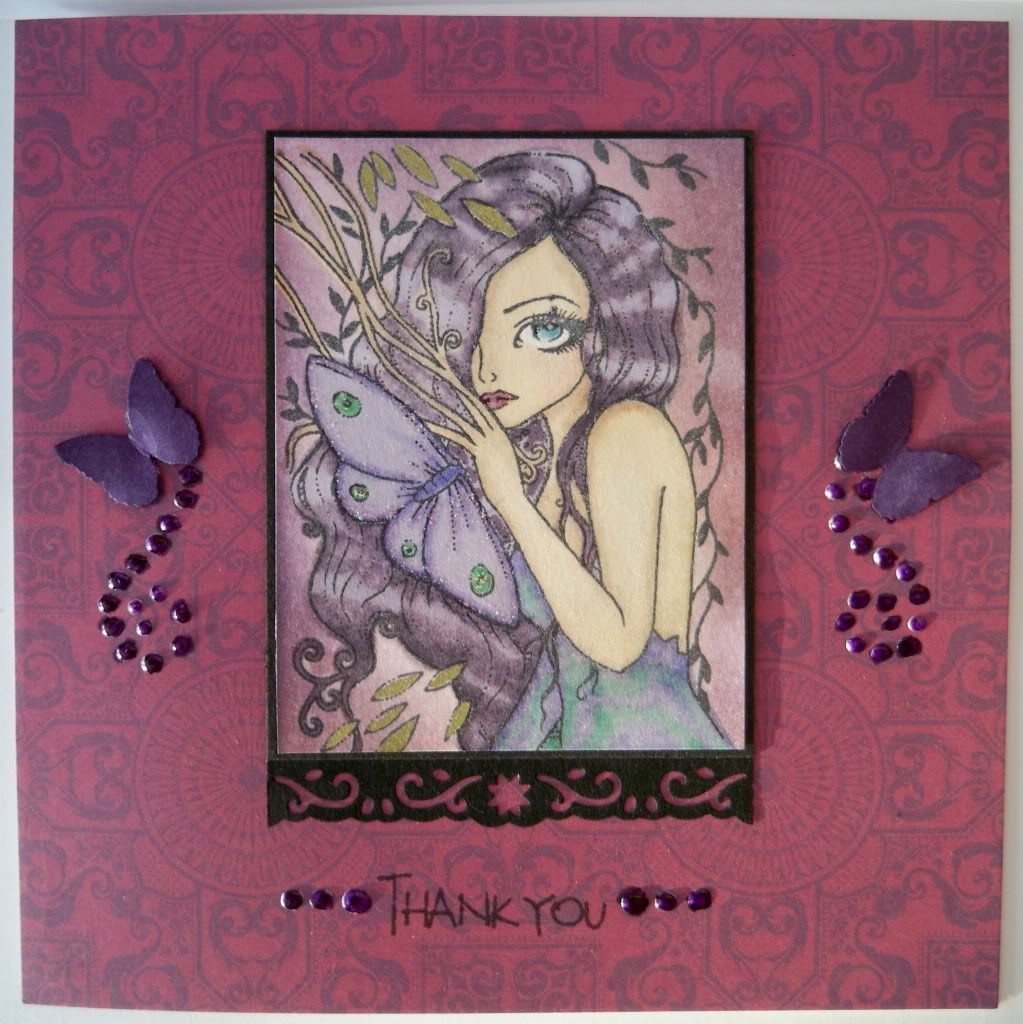
The theme for August's ATC Swap over at The Crafty Place is Water. My swap partner was the lovely Choccy from It's Not Terry's It's Mine if you get the chance stop by and have a peek at her gorgeous creations. Sadly Royal mail managed to trash the lovely card she sent me, hence the reason I have not blogged it. This is the ATC and thank you card I made for her, I hope she liked it!
ATC Tools
Tim Holtz Blender
Water Barrel Brush
ATC Materials
Card - The Papermill
Tim Holtz Distress Inks
Image - Stitchy Bear Stamps
Ferns - CeeD's Stamps
Memento Ink
Stickles
Glimmer Mist
Card Tools
Martha Stewart Butterfly Punch
Tim Holtz Blender
X-Cut Border Punch
Card Materials
Image - Sweet Pea Stamps
Sentiment - Ladybug
DP - Lawrence Llewellyn Bowen
Glimmer Mist
Viva Paper Pen
Promarkers
Stickles
I'd like to enter the ATC into the following challenges:
Charisma Cardz - Inspired by a song (Moon River - Henry Mancini)
City Crafter - Let your light shine
Crafty Cardmakers - Glitter and Sparkle
Cupcake Craft - Lets Get Digital
One Stitch At A Time - Girlie
Wild Orchid Challenge - Make it Sparkle
I'd like to enter the card into the following challenges:
Digi Doodles Shops Best - Write me a message
I ♥ ProMarkers - Myth & Magic
One Stitch At A Time - Girlie
Papertake Weekly - Just One (designer paper)
Wild Orchid Challenge - Make it Sparkle
The Secret Crafter - Keep it Simple
Wednesday 1 September 2010
Winner of the Birthday Blog Hop Candy
Well the party's over and the clearing up is done, so it's time to announce our winners. Before I announce the winner of my candy, I'd like to say a huge thank you to everyone who joined in with the Dragon's Birthday Bash and left so many lovely comments and who also became followers.
I've drawn the winner for the surprise candy and its............... Number 3 - Scatty Jan. Congratulations hun, if you email me your address I'll get your candy out to you.
Subscribe to:
Posts (Atom)
